The Ins And Outs Of An MSA
Change is hard. Ask any business owner and they’ll tell you that the slightest change can cause ripple effects throughout an organization if not...
.png)
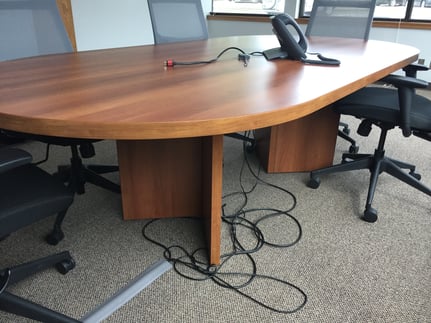
Have a conference room or meeting space that looks like this? Need a solution to eliminate all of the cords, wires, and adapters?
Recently, Microsoft released Microsoft Miracast, a device that can replace all of the wires and adapters, and project your computer screen onto TVs, projectors, and streaming media players. Roughly, it can be described as "HDMI over Wi-Fi". This technology can work across devices, regardless of brand, to negotiate settings for each connection, which simplifies the process for the users, and all of this happens at lightning-fast speeds.
The best part: the device only costs around $50
Setup for any of these adapters is simple: Just plug the adapter into any open HDMI input port on your TV, projector, or monitor, then plug in the small USB cable coming from the side of the device. These USB cables don't actually transfer any data; they're there to provide power to the adapter. The wireless display adapter delivers a reliable connection with up to a 23-foot range.
Ready to modernize your meetings? If you are a Five Nines Managed IT Services client, let your Account Manager know! If you are not a Five Nines client, learn more here!
Already have Miracast and need additional info on how to use the device? Once Miracast has been connected, here are the steps to begin presenting:
With your PC and display ready to project, you need to add the wireless display to your PC. Both devices need to be within range, which usually means that they're in the same room.
After you add the wireless display to your PC, you can project your screen to it and change what you see on each screen.
If you move your PC beyond the range of the wireless display (such as to another room), or if you make your PC sleep or hibernate, the two devices will disconnect. You can also disconnect the wireless display manually.
(Information provided by: Microsoft)

Change is hard. Ask any business owner and they’ll tell you that the slightest change can cause ripple effects throughout an organization if not...

It is no secret that the world of technology is constantly changing, notably Managed IT Services. What Five Niners have learned in technical...
It's a harsh reality for most small and mid-sized businesses, but it's the truth. You simply don’t have the resources to stop well-funded,...